Enable JWT validation with Auth0
You can configure the
jwt-validation Traffic Policy
action to validate tokens you
issue directly from Auth0 on an ngrok-managed domain we'll call
<YOUR_NGROK_DOMAIN> from here on out.
Let's walk through the steps to wire up this integration and secure your APIs, assuming you already have a cloud or agent endpoint running and have applied a Traffic Policy rule before. If not, check out these docs:
Define your API in Auth0
If you've already done this, skip to the next section.
- Log in to your Auth0 tenant dashboard.
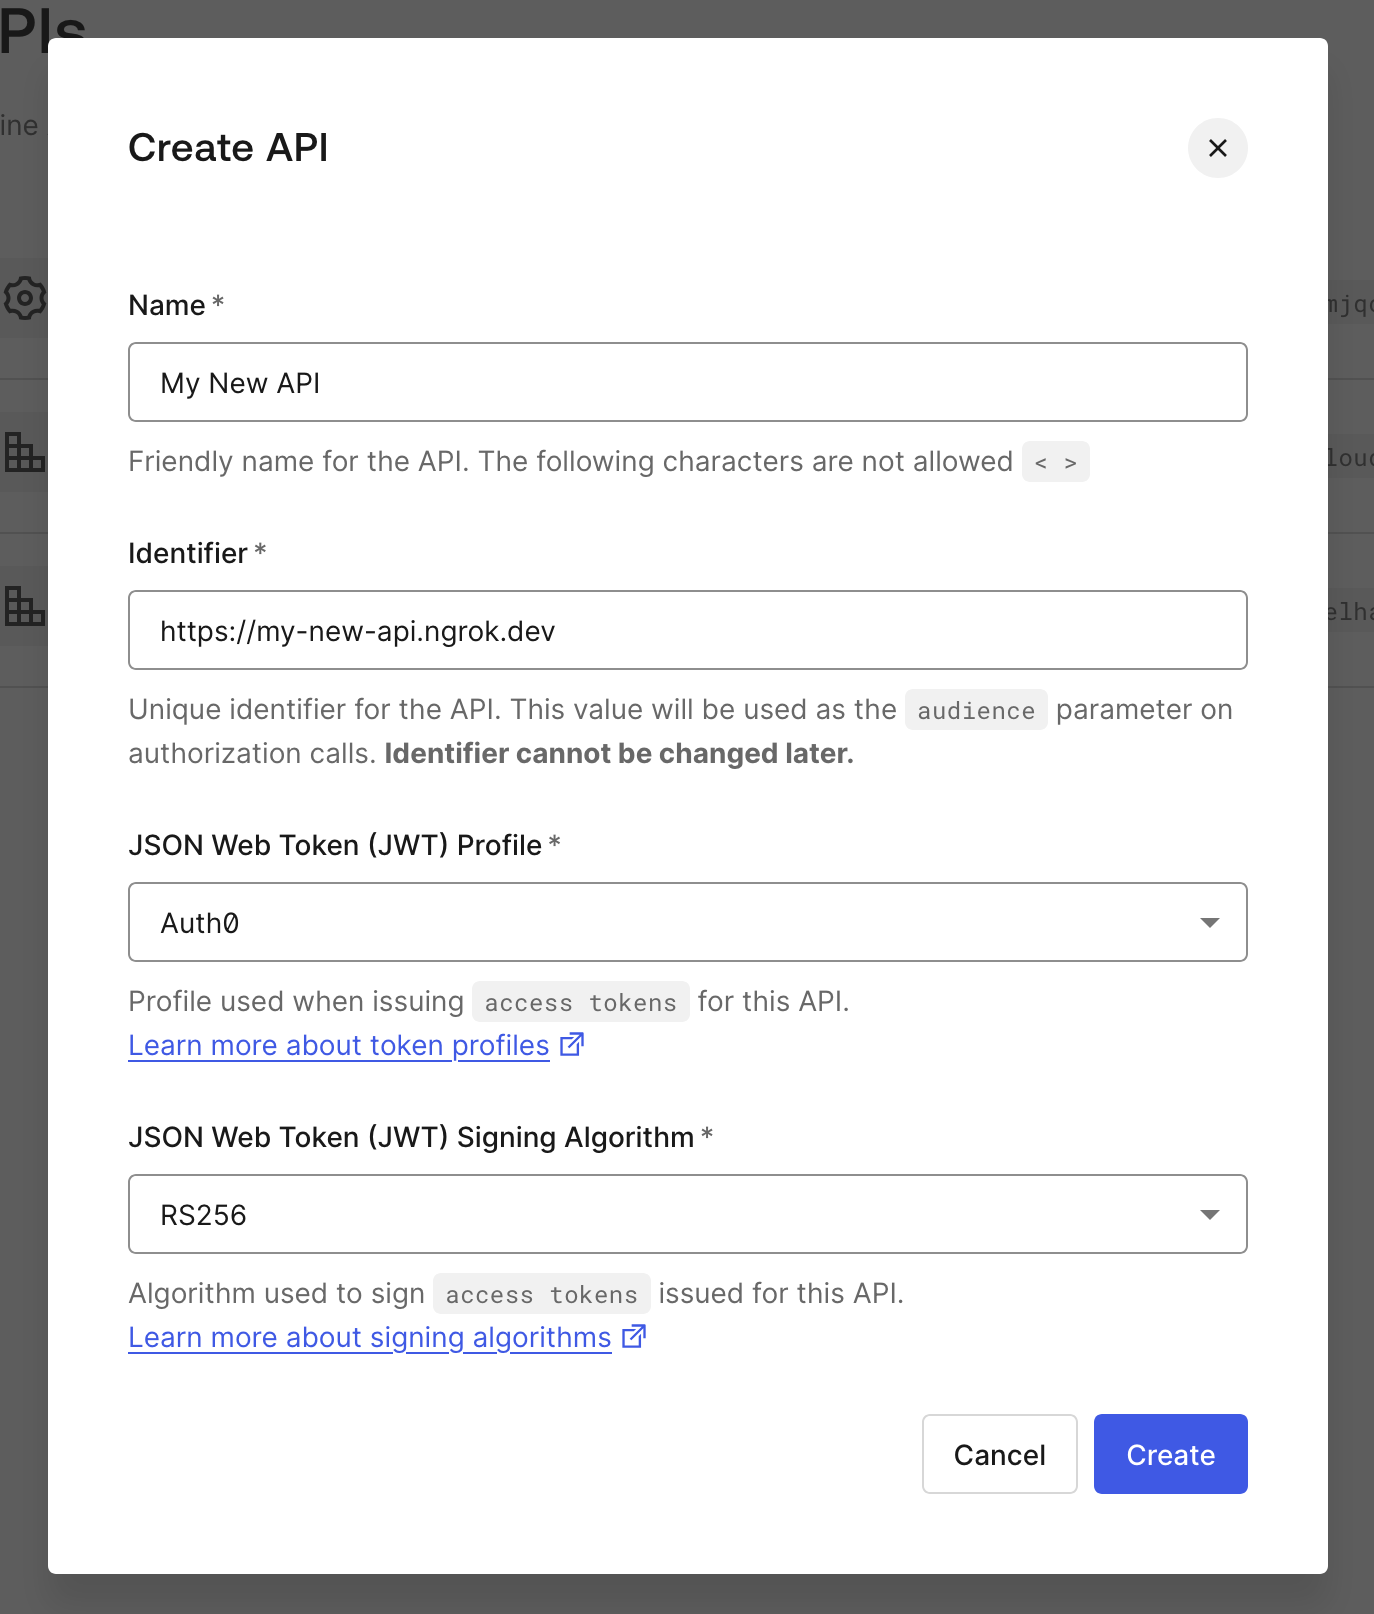
- Select Applications > APIs, then + Create API.
- Name your API whatever you'd like.
- Replace the value of the Identifier field with
<YOUR_NGROK_DOMAIN>. - Leave the default values for JSON Web Token (JWT) Profile and JSON Web Token Signing Algorithm.
- Click Create.
After creating your API, you can define and add scopes needed in the
Permissions tab. These values will be populated in the scope claim of your
JWT.
Access your JWT
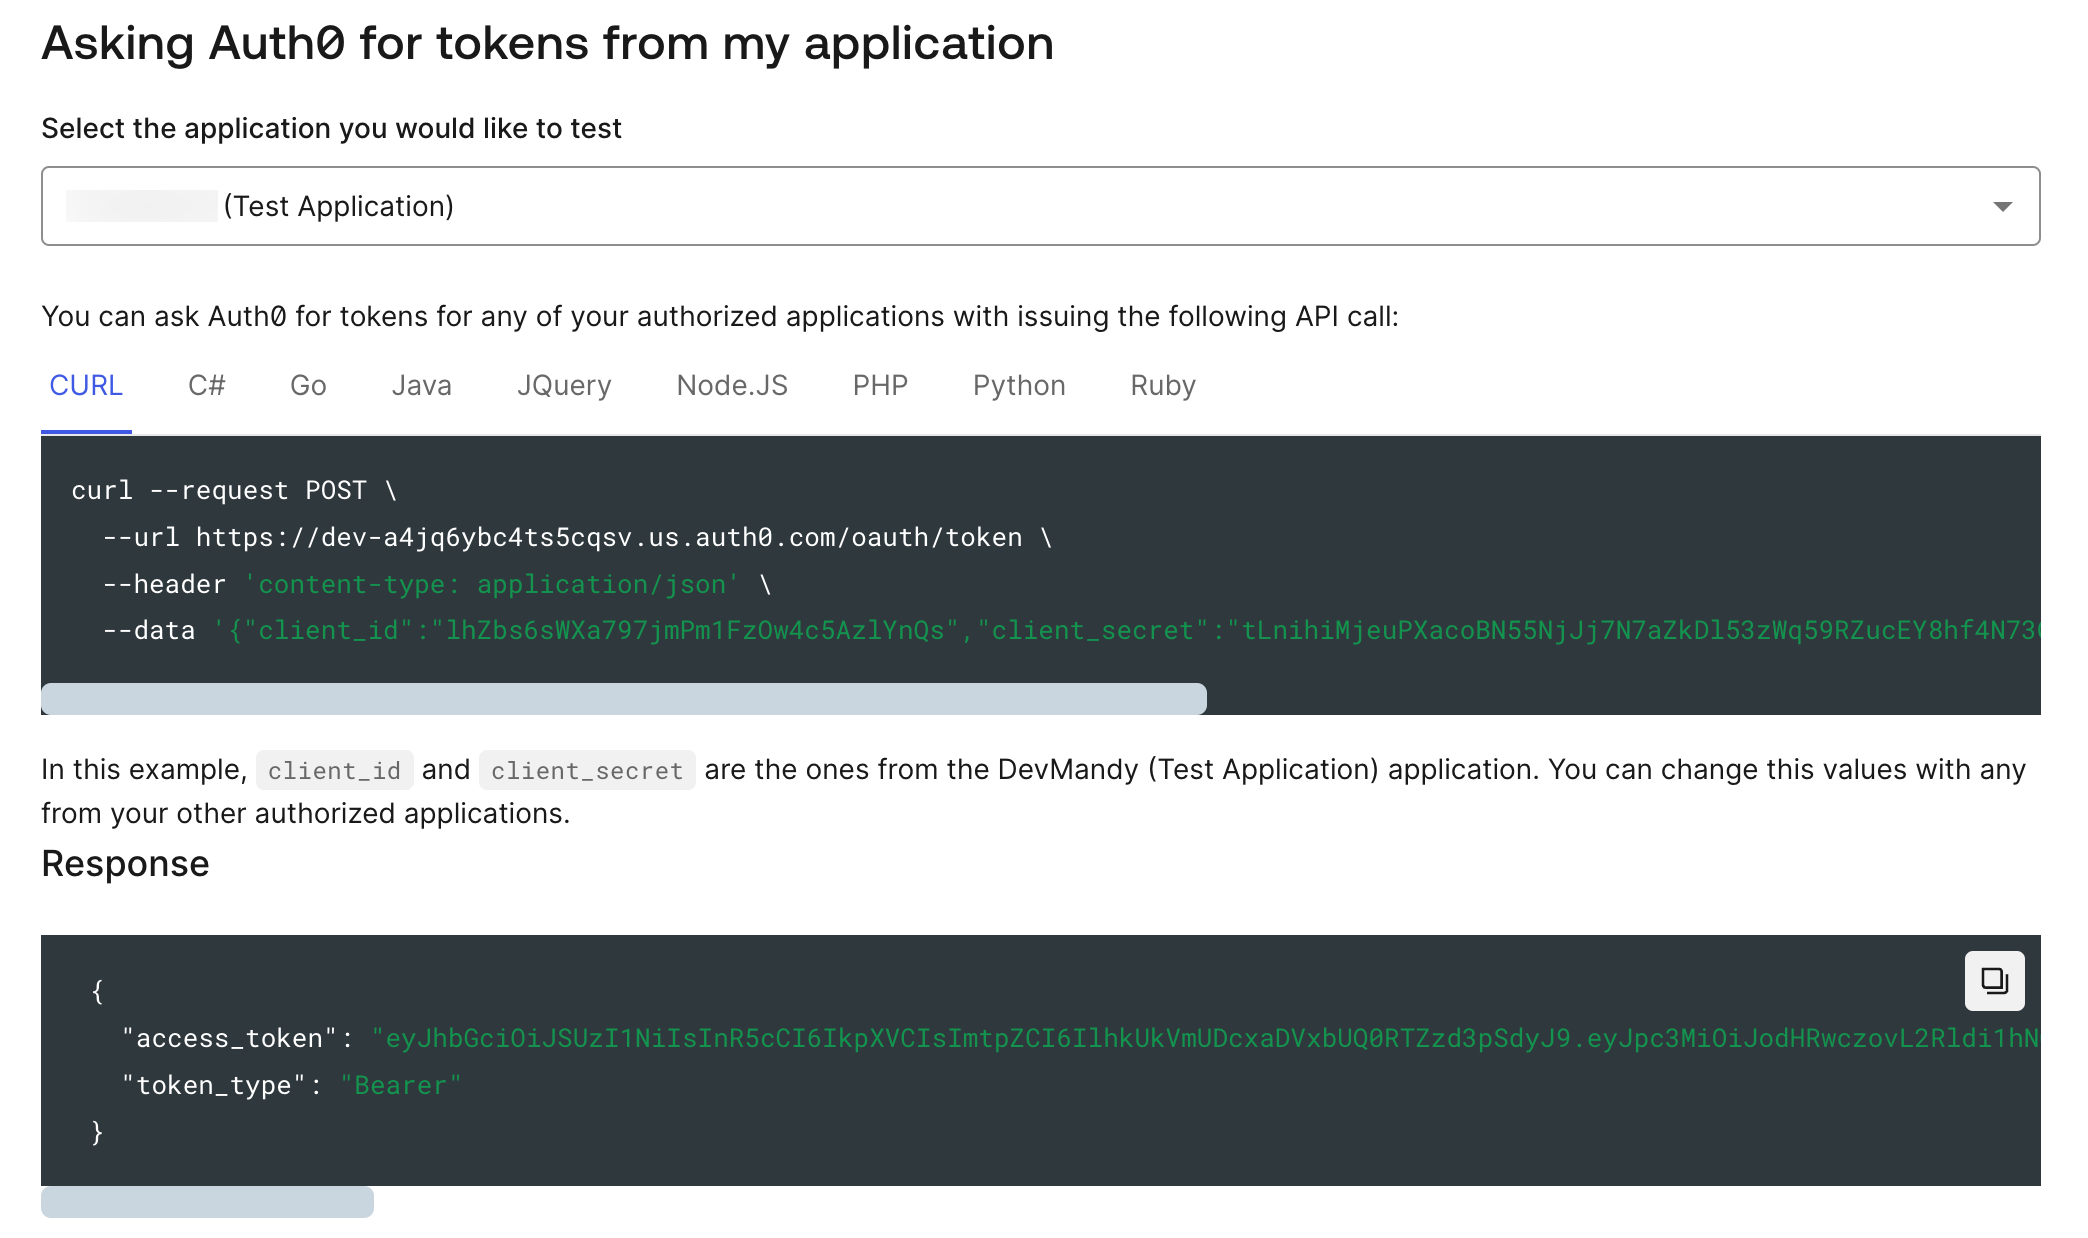
When you create a new API, Auth0 will create an associated application under Applications > APIs in the left navigation bar.
Navigate to your application, and click on the Test tab. Here, you will find a signed, fully functional JWT, as well as examples of how to programmatically generate others.
Create a Machine to Machine application
When you create your API in Auth0, it will automatically create a new Machine to
Machine Application and authorize it to use your new API. If you added
additional scopes for your API, you will need to manually add them to the new
application in the Machine to Machine Applications tab of your new API.
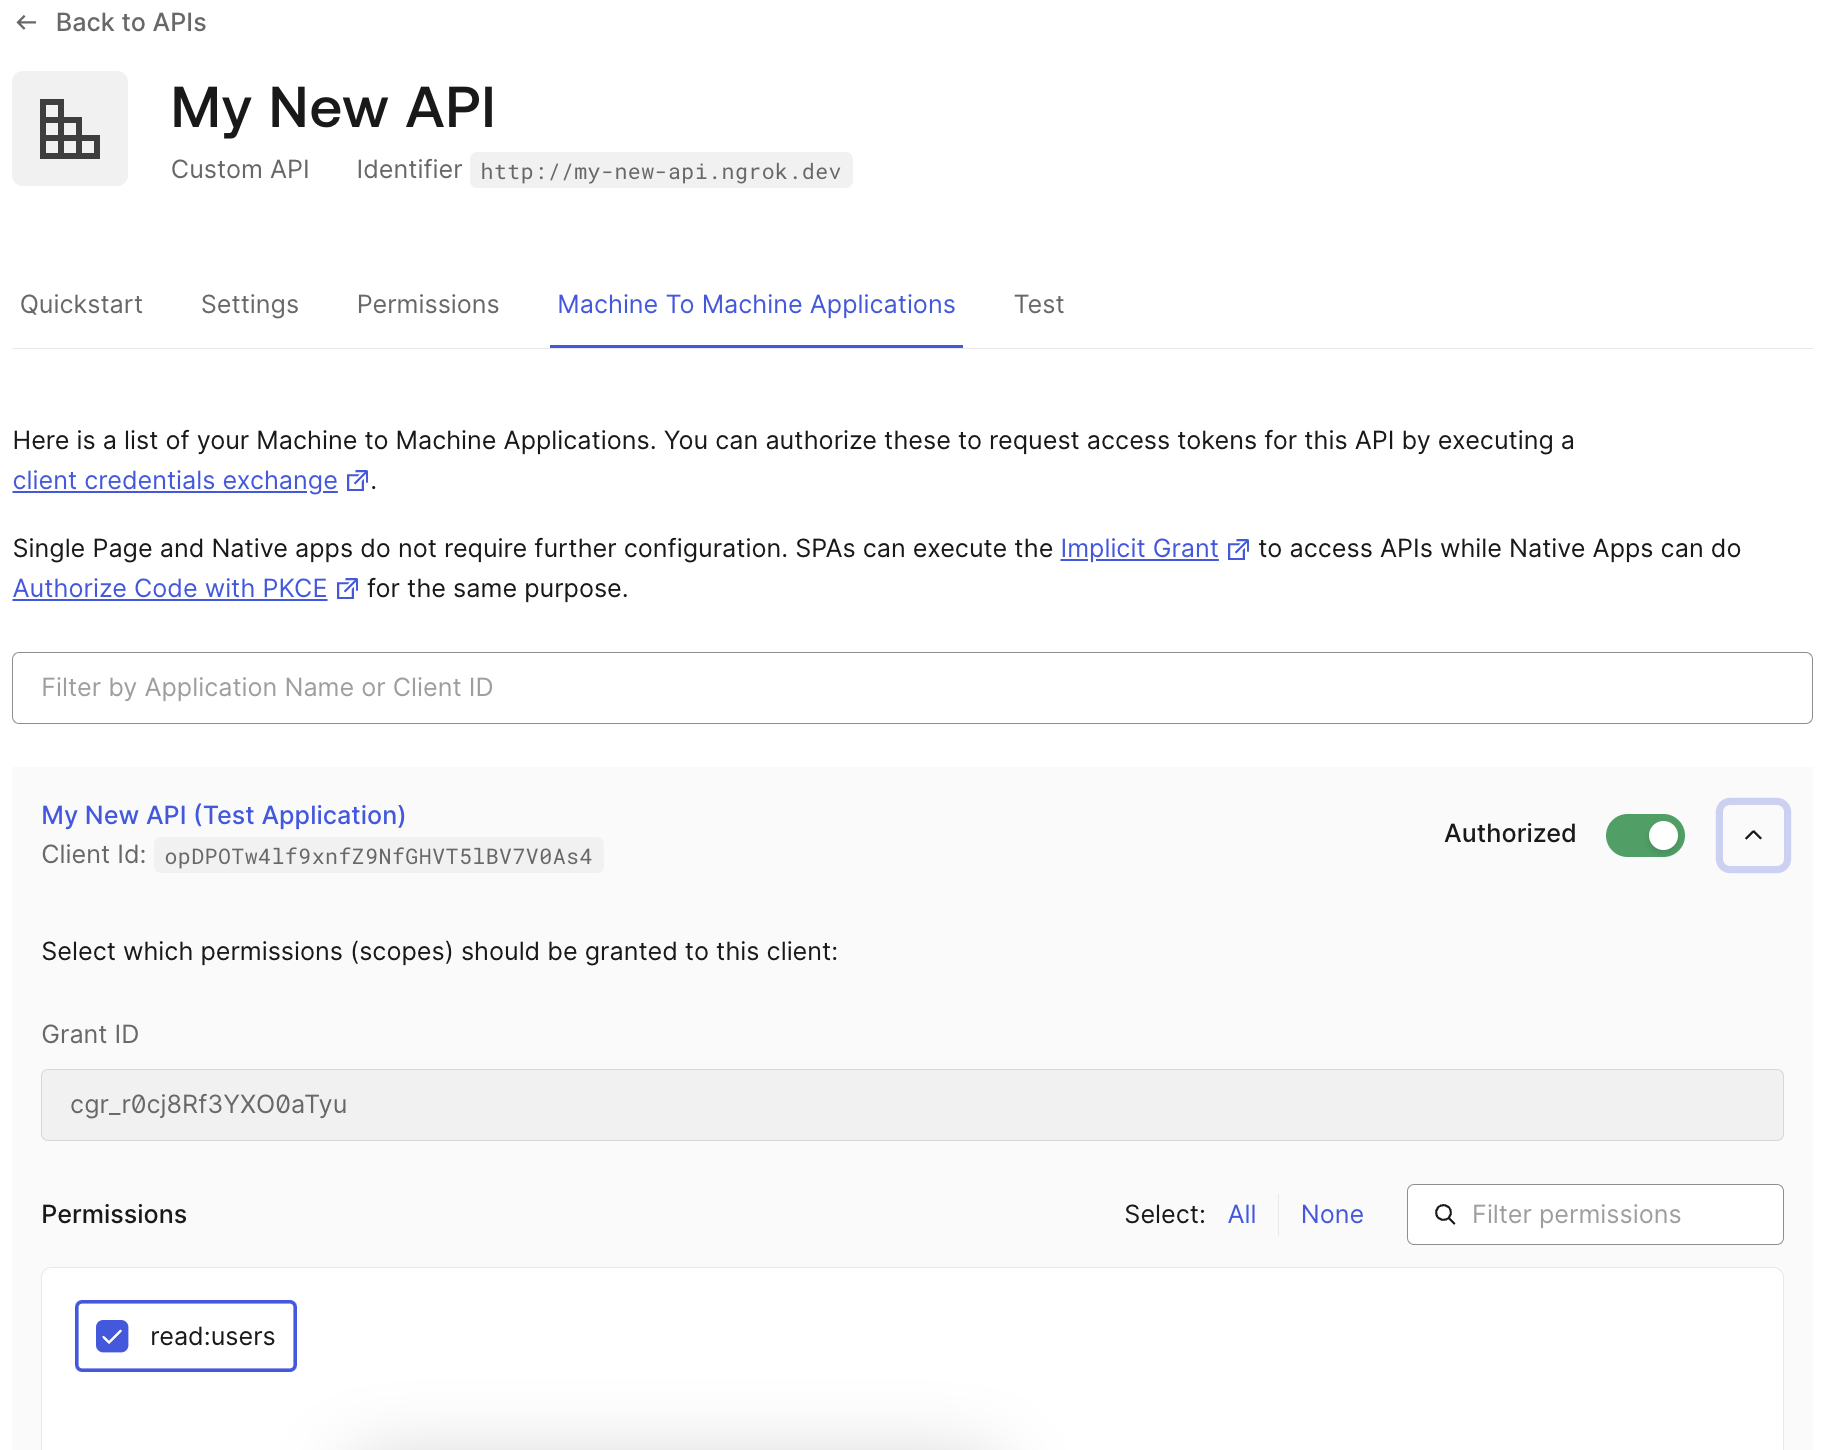
If it did not create one automatically, you can create a new Machine to Machine app and select your new API when prompted.
Configure the jwt-validation Traffic Policy action
You now have everything you need to configure JWT validation in Traffic Policy.
This is an example Traffic Policy configuration
for enabling the action with your settings from Auth0—you'll need to customize the
variables in the issuer.allow_list.value, audience.allow_list.value, and
jws.keys.sources.additonal_jkus fields below.
- Find
<YOUR_TENANT_ID>and<AUTH0_REGION>in your Auth0 dashboard. <YOUR_NGROK_ID>matches what you entered into Auth0 as the Identifier.
Loading…
You can also take the example token from the Test tab of your Auth0 Application and decode it using jwt.io to discover and customize the values as follows:
| Field | Claim | Description |
|---|---|---|
issuer.allow_list.value | iss | The issuer is usually the full URL of the Auth0 application. It can be found in your .well-known/openid-configuration URL, which is usually available at https://<YOUR_AUTH0_TENANT_ID>.<AUTH0_REGION>.auth0.com/.well-known/openid-configuration. |
audience.allow_list.value | aud | The audience claim is the identifier of your API and can be found in the APIs section of your Auth0 dashboard. It's usually the same as https://<YOUR_NGROK_DOMAIN>. |
http.tokens | n/a | This is the location of the token in the incoming request. You do not need to change this value. |
jws.allowed_algorithms | alg | The algorithm your API uses to decode the JWT. You can find this value in Auth0 in your API, on the Settings tab, under Token Settings. |
jws.keys.sources.additional_jkus | n/a | This is the URL to use to verify the JWT signature. It can be found in your .well-known/openid-configuration URL, which is usually available at https://<YOUR_AUTH0_TENANT_ID>.<AUTH0_REGION>.auth0.com/.well-known/openid-configuration. |
Test out JWT validation on your endpoint
You can now start your endpoint with the new Traffic Policy rule applied.
Then give it a test using curl:
Loading…
If you were able to see the response from your API, everything is working correctly. You can double check by sending a malformed token.
If you get an error with a valid token, go back and double check that your issuer and audience values are correct in your Traffic Policy rule.